モーダルウィンドウをHTMLとCSSのみで作成する方法を色々と模索しましたので、やってみた所感と、その備忘録を記します。
目次
モーダルウィンドウはHTMLとCSSのみで作成できるか
結論から申しますとモーダルウィンドウはHTMLとCSSのみで作成できます。
しかし、どれだけがんばっても保守性かユーザビリティを犠牲にしなければいけないことがわかりました。
それぞれの方法とその特徴について記します。
:target疑似クラスを使用する方法(おすすめ度★☆☆)
:tagetはURLのフラグメント識別子(#記号)と同じIDを持つ要素を表す疑似要素です。
例えば、https://samplehoge.com/#modalというURLの時、:target疑似クラスでid=”modal”の要素にCSSを適用する事ができます。
この仕組みを利用してモーダルウィンドウを作成する事ができます。
保守性・ユーザビリティ両面であまりおすすめできません。
デメリット
・履歴が残るので一度開いて閉じた後にブラウザバックすると、モーダルが開いてしまう
・複数置く時に、id、aタグのhrefを変更しなければいけない
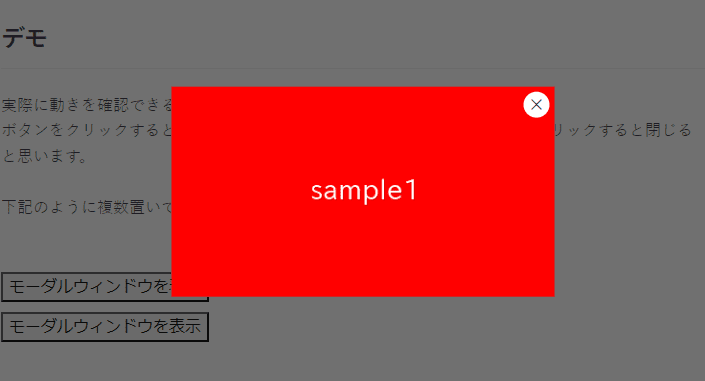
デモ
コード
<style>
    .modal .content:not(:target),
    .modal .content:not(:target) + .bg {
        display: none;
    }
    .modal a {
        appearance: none;
        color:inherit;
        text-decoration: none;
    }
    .modal .content {
        position: fixed;
        inset: 0;
        margin: auto;
        width: fit-content;
        height: fit-content;
        background: #fff;
        padding: 10px;
        border: 2px solid;
        z-index: 99;
    }
    .modal .content + .bg {
        position: fixed;
        inset: 0;
        background: #1119;
        z-index: 98;
    }
    .modal .content .close-btn {
        position: absolute;
        top: 10px;
        right: 10px;
        line-height: 0.6;
        font-size: 36px;
    }
</style>
<div class="modal">
    <a href="#modal1">モーダルウィンドウを開く</a>
    <div id="modal1" class="content">
        <a href="#!" class="close-btn">×</a>
        <img src="./img/sample.png">
        <input type="text">
    </div>
    <a href="#!" class="bg"></a>
</div>
チェックボックスとラベルを使用する方法(おすすめ度★☆☆)
こちらは隣接セレクタを使用して、チェックボックスがオンの隣のコンテンツのみ表示状態にするという方法です。
ユーザービリティの面では特に問題ありませんが、チェックボックスに紐づけるlabelが多すぎるので保守性の面であまりおすすめできません。
デメリット
・複数置く時にid、labelのfor(三か所)を書き換えなければいけない
デモ

コード
<style>
    .modal-check,
    .modal-check:not(:checked) + .modal {
        display: none;
    }
    .modal {
        position: relative;
        z-index: 99;
    }
    .modal .bg {
        position: fixed;
        inset: 0;
        background: #1119;
    }
    .modal .content {
        position: fixed;
        margin: auto;
        inset: 0;
        width: fit-content;
        height: fit-content;
        background: #fff;
        padding: 10px;
        border: 2px solid;
    }
    .modal .content .close-btn {
        position: absolute;
        top: 10px;
        right: 10px;
        line-height: 0.6;
        font-size: 36px;
    }
</style>

<label for="modal1">モーダルウィンドウを開く</label>
<input id="modal1" type="checkbox" class="modal-check">
<div class="modal">
    <label for="modal1" class="bg"></label>
    <div class="content">
        <label for="modal1" class="close-btn">×</label>
        <img src="./img/sample.png">
        <input type="text">
    </div>
</div>
details&summaryを使用する方法(おすすめ度★★☆)
details&summaryはボタンクリックでコンテンツを開く機能をデフォルトで備えているので、これを利用してモーダルウィンドウを作成する事もできます。
下記二点のデメリットがありますが許容できなくもない気はします。
デメリット
・モーダルを開いた時ボタンが消える
・閉じるボタンをコンテンツに対してabsoluteで配置する事しかできない
デモ
モーダルウィンドウを開く

コード
<style>
    .modal[open] {
        position: fixed;
        inset: 0;
        margin: auto;
        width: fit-content;
        height: fit-content;
    }
    .modal[open] summary:before{
        content: "";
        position: fixed;
        inset: 0;
        background: #1119;
        z-index: 98;
    }
    .modal[open] summary:after{
        content: attr(data-close-text);
        position: absolute;
        top: 10px;
        right: 10px;
        line-height: 0.6;
        font-size: 36px;
        z-index: 100;
    }
    .modal[open] .trigger,
    .modal summary::-webkit-details-marker {
        display: none;
    }
    .modal summary {
        list-style-type: none;
        display: inline-block;
    }
    .modal .content {
        background: #fff;
        padding: 10px;
        border: 2px solid;
        position: relative;
        z-index: 99;
    }
</style>

<details class="modal">
    <summary data-close-text="×">
        <div class="trigger">モーダルウィンドウを開く</div>
    </summary>
    <div class="content">
        <img src="./img/sample.png">
        <input type="text">
    </div>
</details>
完全なモーダルウィンドウを作るには(おすすめ度★★★)
HTML・CSSのみでもモーダルウィンドウを作れることは今見てきたとおりです。
しかし、ユーザビリティ・保守性両方を損なわずにモーダルウィンドウを作るには、やはりJavascriptを使った方がよさそうです。
今、dialog要素というものがあり、少量のJavascriptでモーダルウィンドウを作ることができます。
下記に少ないJavascript(たった4行)でモーダルウィンドウを作る方法を載せておりますので、ご参照ください。
モーダルウィンドウを実装する
以上、HTMLとCSSのみでモーダルウィンドウは作成する方法でした。
