In this article, I am going to describe about how to preview a single image when file is selected using javascript.
I have prepared a Demo which can be touched at the lower.
Table of Contents
①Receive the Selected File
Let’s look at how to receive the selected file through a file selection dialog like the one below.
<input type="file">
By adding the onchange attribute as shown below, you can call a function when a file is selected. By specifying this as an argument, you can pass the HTMLElement of the file selection dialog itself to the function.
<input type="file" onchange="preview(this)"> <!-- modified -->
Define the preview method called by onchange.
You can obtain the FileList object by referencing the files property of the passed HTMLElement.
Since we are assuming to preview a single image in this case, we retrieve the element at index 0 from the FileList.
function preview(elem) {
    const file = elem.files[0]
    console.log(file)
}
②Generate an <img> tag based on the received File
You can generate a Blob URL by passing a File object to the createObjectURL method of the URL class.
By specifying this Blob URL as the src attribute of an tag, you can display the image in the browser.
function preview(elem) {
    const file = elem.files[0]
    const image = `<img src=${URL.createObjectURL(file)}>`  //added
}
③Insert the generated <img> tag
In the HTML, place an empty <div> tag next to the file selection dialog as a preview area.
<input type="file" onchange="preview(this)">
<div></div>    <!-- added -->
In JavaScript, insert an <img> tag into the <div> tag placed next to the file selection dialog.
You can retrieve the adjacent element using nextElementSibling and overwrite its content using innerHTML.
function preview(elem) {
    const file = elem.files[0]
    const image = `<img src=${URL.createObjectURL(file)}>`
    elem.nextElementSibling.innerHTML = image   //added
}
④Define the Width of the Preview Area
Now, the width of the preview area varies depending on the selected image.
Let’s standardize the width of the preview area by adding classes and styles as shown below.
You can achieve this by defining the size of the container and expanding the image to fill its width.
<!--▼ added ▼-->
<style>
    .preview-area { width: 300px }
    .preview-area img { width: 100% }
</style>
<!--▲ added ▲-->

<input type="file" onchange="preview(this)">
<div class="preview-area"></div>    <!-- modified -->
We’ve got the basic functionality in place up to this point, but let’s take a look at two issues.
⑤Handling When File Selection is Canceled
File selection dialogs provide an option for “Cancel.”
In browsers like Chrome and Edge (as of September 27, 2023), when file selection is canceled, the originally selected file is cleared.
Therefore, it’s possible for the files to be cleared, yet the preview image remains.
To avoid this situation, let’s attempt to insert the <img> tag only when the file is not empty.
Using a ternary operator, we will place the <img> tag in the image variable if the condition check for the file variable is true, and an empty string if it is false.
function preview(elem) {
    const file = elem.files[0]
    const image = (file) ? `<img src=${URL.createObjectURL(file)}>` : ''    //modified
    elem.nextElementSibling.innerHTML = image
}
⑥Handling When a Non-image File is Selected
Of course, in the file selection dialog, it’s possible to select a non-image file.
With the current preview feature, when a non-image file is selected, a white background with a black-bordered rectangle is displayed where an image should be shown.
To avoid this, let’s insert the <img> tag only when the selected file is an image.
We’ll do this by referencing the type property of the File object and placing the <img> tag in the image variable only when it starts with “image/“, otherwise assigning an empty string.
function preview(elem) {
    const file = elem.files[0]
    const isOK = file?.type?.startsWith('image/')                                   // added
    const image = (file && isOK) ? `<img src=${URL.createObjectURL(file)}>` : ''    // modified
    elem.nextElementSibling.innerHTML = image
}It helps prevent errors when attempting to access properties or execute methods on null or undefined values.
Here, we are using the optional chaining operator because “file” may become undefined in some cases.
Demo
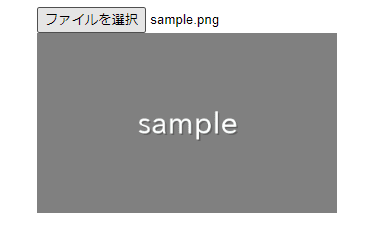
I have prepared a Demo which can be touched.
Preview image will be displayed when a file is selected.
We can put file selection dialog as many as we like.
The full text of source code
In the end, I put the full text of source code.
<style>
    .preview-area{ width: 300px; }
    .preview-area img{ width: 100%; }
</style>

<input type="file" onchange="preview(this)">
<div class="preview-area"></div>

<input type="file" onchange="preview(this)">
<div class="preview-area"></div>


<script>
    function preview(elem) {
        const file = elem.files[0]
        const isOK = file?.type?.startsWith('image/')
        const image = (file && isOK) ? `<img src=${URL.createObjectURL(file)}>` : ''
        elem.nextElementSibling.innerHTML = image
    }
</script>
That is all, it was about how to preview a single image when file is selected using javascript.