In this article, We are going to describe about how to preview multiple images before uploading using javascript.
If you want to preview only one image, the below article might be helpful.
[Javascript] How to preview an image when file is selected
Table of Contents
Complete Image
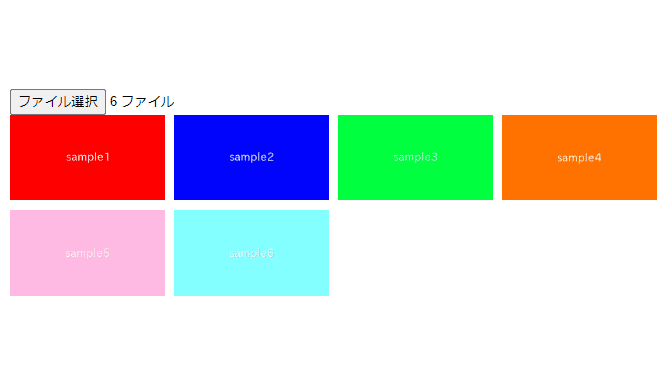
We aim to implement a functionality to preview all selected files as follows.

HTML
Let’s start by placing the file selection element and preview area.
By adding multiple attribute to input[type=file], user would be able to chose multiple files.
The “preview” function (we will implement later) will be called when files are selected because of onchange attribute.
<input type="file" onchange="preview(this)" multiple>
<div class="preview-area"></div>
CSS
Let’s style the preview area with CSS.
Here the images are displayed in four columns.
.preview-area{
    gap: 10px;
    display: grid;
    align-items: center;
    grid-template-columns: repeat(4, 1fr);
}
.preview-area img{
    width: 100%;
}
Javascript
This is the function which is called when files are selected.
2nd line: loop started.
3rd line: create blobURL from file.
4th line: create img element.
6th line: preview after the loop ended.
function preview(elem, output = '') {
    Array.from(elem.files).map((file) => {
        const blobUrl = window.URL.createObjectURL(file)
        output+=`<img src=${blobUrl}>`
    })
    elem.nextElementSibling.innerHTML = output
}
Demo
We have prepared a demo that you can actually touch.
All the selected images should be previewed, so please give it a try.
The full text of source code
In the end, I put the full text of source code.
<style>
    .preview-area{
        gap: 10px;
        display: grid;
        align-items: center;
        grid-template-columns: repeat(4, 1fr);
    }
    .preview-area img{
        width: 100%;
    }
</style>

<input type="file" onchange="preview(this)" multiple>
<div class="preview-area"></div>

<script>
    function preview(elem, output = '') {
        Array.from(elem.files).map((file) => {
            const blobUrl = window.URL.createObjectURL(file)
            output+=`<img src=${blobUrl}>`
        })
        elem.nextElementSibling.innerHTML = output
    }
</script>
That is all, it was about how to preview multiple images before uploading using javascript.