In this article,I will describe about how to create vertical slider with swiper.js.
Furthermore, we will also provide instructions on how to orient navigation and pagination vertically.
I’m going to pursue the matter on the premise that you know how to make normal slider with Swiper.js. So if you are new to Swiper.js, firstly check the below article.
[Swiper] How to create a simple slider with swiper.js
Table of Contents
①Create a normal swiper slider
To make it clear, we will create normal swiper slider first and then make changes.
<link rel="stylesheet" href="https://cdn.jsdelivr.net/npm/swiper@8/swiper-bundle.min.css">
<script src="https://cdn.jsdelivr.net/npm/swiper@8/swiper-bundle.min.js"></script>
<style>
.sample-slider{
width: 42vw;
height: 23vw;
}
.sample-slider img{
width:100%;
}
</style>
<div class="swiper sample-slider">
<div class="swiper-wrapper">
<div class="swiper-slide"><img src="img/sample1.png"></div>
<div class="swiper-slide"><img src="img/sample2.png"></div>
<div class="swiper-slide"><img src="img/sample3.png"></div>
</div>
<div class="swiper-pagination"></div>
<div class="swiper-button-prev"></div>
<div class="swiper-button-next"></div>
</div>
<script>
const swiper = new Swiper('.sample-slider', {
loop: true, //loop
autoplay: { //autoplay
delay: 2000,
},
pagination: { //pagination(dots)
el: '.swiper-pagination',
},
navigation: { //navigation(arrows)
nextEl: ".swiper-button-next",
prevEl: ".swiper-button-prev",
},
})
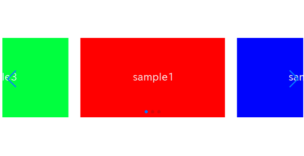
</script>Now we can see normal swiper slider.


Here, I used vw(Viewport Width) to make the slider responsive.
②Make the slid direction vertical
By putting “vertical” at direction option, the slider will move verticaly.
const swiper = new Swiper('.sample-slider', {
    loop: true,
    direction: "vertical",    //add
    autoplay: {
        delay: 2000,
    },
    pagination: {
        el: '.swiper-pagination',
    },
    navigation: {
        nextEl: ".swiper-button-next",
        prevEl: ".swiper-button-prev",
    },
})
The slider has become to move verticaly.
Arrows has moved to the right side automatically, but arrows are at the same position.
③Customize the arrows for vertical slider
It is little strange that arrows are at left and right although slider move verticaly, so lets customize it.
Here, I make the arrows direction up and down and put the right side.
.sample-slider [class^=swiper-button]{
transform:rotate(90deg);
top: initial;
left: initial;
right: 10px;
margin: 0;
}
.sample-slider .swiper-button-prev{
top:0;
}
.sample-slider .swiper-button-next{
bottom:0;
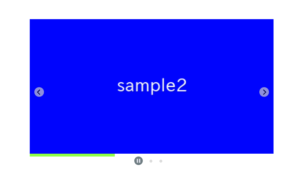
}Now the arrows are perfect for vertical slider.
④Adjust dots position
Add CSS as below and adjust dots position.
下記のようにCSSを追記して、ドットの縦位置を矢印に合わせます。
.sample-slider .swiper-pagination{
    right:20px;
}
Now it looks good!
The full text of source code
In the end,I put the full text of source code.
<link rel="stylesheet" href="https://cdn.jsdelivr.net/npm/swiper@8/swiper-bundle.min.css">
<script src="https://cdn.jsdelivr.net/npm/swiper@8/swiper-bundle.min.js"></script>

<style>
    .sample-slider{
        width: 60vw;
        height: 33vw;
    }
    .sample-slider img{
        width: 100%;
    }
    .sample-slider [class^=swiper-button]{
        transform:rotate(90deg);
        top: initial;
        left: initial;
        right: 10px;
        margin: 0;
    }
    .sample-slider .swiper-button-prev{
        top:0;
    }
    .sample-slider .swiper-button-next{
        bottom:0;
    }
    .sample-slider .swiper-pagination{
        right:20px;
    }
</style>


<div class="swiper sample-slider">
    <div class="swiper-wrapper">
        <div class="swiper-slide"><img src="./img/sample1.png"></div>
        <div class="swiper-slide"><img src="./img/sample2.png"></div>
        <div class="swiper-slide"><img src="./img/sample3.png"></div>
    </div>
    <div class="swiper-pagination"></div>
    <div class="swiper-button-prev"></div>
    <div class="swiper-button-next"></div>
</div>


<script>
    const swiper = new Swiper('.sample-slider', {
        loop: true,                         //loop
        direction: "vertical",              //slide direction
        autoplay: {                         //autoplay
            delay: 2000,
        },
        pagination: {                       //pagination(dots)
            el: '.swiper-pagination',
        },
        navigation: {                       //navigation(arrows)
            nextEl: ".swiper-button-next",
            prevEl: ".swiper-button-prev",
        },
    })
</script>
That is all,It was about how to create vertical slider and adjust looks with swiper.js.
I have been introduced various slider which can be made by swiper.js.
Swiper Demo 22 Slider