Swiper.js provides an option called “creativeEffect” that allows for considerable customization of the previous and next slides. By effectively utilizing this option, you can create your own original slider.
In this article, I am going to explain how to use creativeEffect with demonstrations, and show some sample sliders which is created using creativeEffect.
[Swiper] How to create a simple slider with swiper.js
Table of Contents
Create a base slider
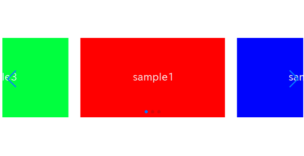
To make it clear, let’s start by creating a base slider and then make changes to it.
To make the previous and next slides visible, we are using slidesPerView: 2 and padding: 150px.
<link rel="stylesheet" href="https://cdn.jsdelivr.net/npm/swiper@8/swiper-bundle.min.css">
<script src="https://cdn.jsdelivr.net/npm/swiper@8/swiper-bundle.min.js"></script>

<style>
    .swiper{
        padding: 150px 0;
    }
    .swiper img{
        width: 100%;
        vertical-align: bottom;
    }
</style>


<div class="swiper sample-slider">
    <div class="swiper-wrapper">
        <div class="swiper-slide"><img src="/wp-content/uploads/2022/12/sample1.png"></div>
        <div class="swiper-slide"><img src="/wp-content/uploads/2022/12/sample2.png"></div>
        <div class="swiper-slide"><img src="/wp-content/uploads/2022/12/sample3.png"></div>
        <div class="swiper-slide"><img src="/wp-content/uploads/2022/12/sample4.png"></div>
        <div class="swiper-slide"><img src="/wp-content/uploads/2022/12/sample5.png"></div>
        <div class="swiper-slide"><img src="/wp-content/uploads/2022/12/sample6.png"></div>
    </div>
    <div class="swiper-pagination"></div>
    <div class="swiper-button-prev"></div>
    <div class="swiper-button-next"></div>
</div>


<script>
    const swiper = new Swiper('.sample-slider', {
        loop: true,
        slidesPerView: 2,
        autoplay: {
            delay: 2000,
        },
        pagination: {
            el: '.swiper-pagination',
        },
        navigation: {
            nextEl: ".swiper-button-next",
            prevEl: ".swiper-button-prev",
        },
    })
</script>
Now we can see the base slider.
We will make changes from here.


Use creativeEffect
To use creativeEffect, we need add effect: “creative” as below.
We can apply changes to the previous and next slides in the creativeEffect option.
const swiper = new Swiper('.sample-slider', {
    .
    .
    .
    effect: "creative",
    creativeEffect: {
        // apply changes to the previous/next slides here
    }
})
Translate the previous and next slides
We can translate the previous and next slides by adding translate option in the next/prev option.
You can specify three values in an array. It is easier to understand if you think of them as representing the horizontal, vertical, and depth positions in that order.
If you want to specify the values in percentages, enclose them in quotation marks. Negative values can also be specified.
const swiper = new Swiper('.sample-slider', {
    .
    .
    .
    effect: "creative",
    creativeEffect: {
        prev: {
            translate: ['-100%',-200,-1000], //([horizontal, vertical, depth])
        },
        next: {
            translate: ['100%',200,-1000], //([horizontal, vertical, depth])
        },
    }
})
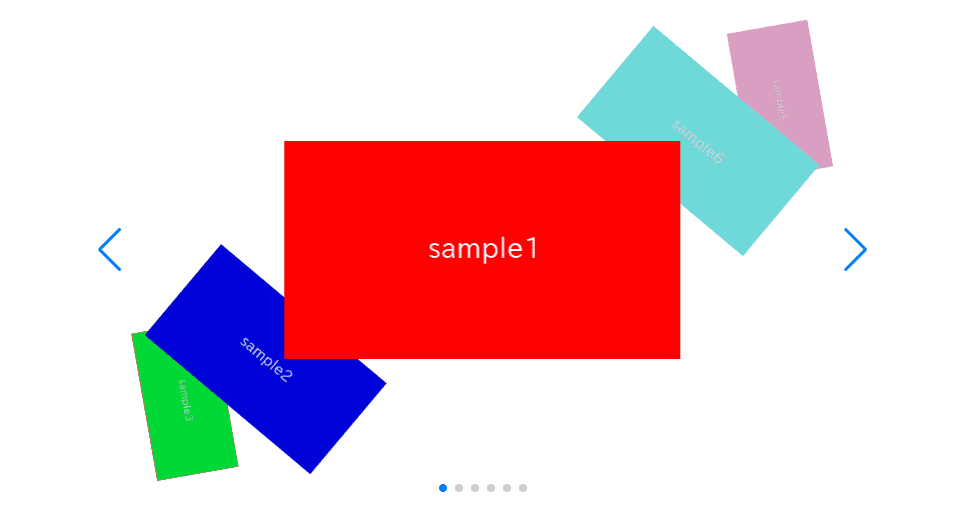
In the example above, the previous and next slides are shifted by 100% horizontally, 200 vertically, and 1000 in depth. As a result, it would look as follows:
Rotate the previous and next slides
We can rotate the previous and next slides by adding rotate option in the next/prev option.
You can specify three values in an array. It is easier to understand if you think of it as rotating around the X-axis, Y-axis, and Z-axis in order.
const swiper = new Swiper('.sample-slider', {
    .
    .
    .
    effect: "creative",
    creativeEffect: {
        prev: {
            translate: ['-100%',-100,-300],
            rotate: [-45,-45,-45], //([rotate around the X-axis, rotate around the Y-axis, rotate around the Z-axis])
        },
        next: {
            translate: ['100%',100,-300],
            rotate: [45,45,45], //([rotate around the X-axis, rotate around the Y-axis, rotate around the Z-axis])
        },
    }
})
If the concept of rotating around the Z-axis is a bit unclear, you can imagine that lasers are emanating from your eyes, piercing through the slides, and the slides rotate around those laser beams. The slides are impaled by the laser beams, so they can only rotate clockwise or counterclockwise.
Other options that can be specified for previous and next option
In addition to translate and rotate, there are other options available that can be used in conjunction with next and prev option.
| option | description |
|---|---|
| opacity | You can specify the opacity of the previous/next slides using numerical values ranging from 0 to 1. |
| scale | You can specify the scale ratio of the previous/next slides using numerical values. For example, specifying a value of 2 will double the size of the slides. |
| shadow | By specifying true, you can add a shadow to the previous/next slides. The shadow will appear on the surface of the slides, not underneath them. |
Increase the number of displayed slides
There is another option to enhance the expressiveness of creativeEffect called limitProgress. By specifying a numerical value, you can increase the number of slides displayed.
const swiper = new Swiper('.sample-slider', {
    .
    .
    .
    effect: "creative",
    creativeEffect: {
        limitProgress:3,    // increase the number of displayed slides
        prev: {
            translate: ['-100%',-200,-1000],
        },
        next: {
            translate: ['100%',200,-1000],
        },
    }
})
The term “increasing the number of displayed slides” may not be an accurate representation, but limitProgress is an option in creativeEffect that allows you to specify where to fix the slides beyond the previous and next slides. The default value is set to 1. With a value of 1, the slides after the previous and next slides will be fixed in the same state, making them invisible. When you set it to 2, the slides after the next slides of the previous and next slides will be fixed, resulting in a visible shift from the next slides of the previous and next slides.
It may be difficult to explain in words, so I encourage you to try it out by implementing and running it yourself!
A few sample sliders created using creativeEffect.
That concludes the explanation of creativeEffect. Finally, let me introduce a few sample sliders created using creativeEffect.
Slider with diagonal motion
<div class="swiper sample-slider">
    <div class="swiper-wrapper">
        <div class="swiper-slide"><img src="./img/sample1.png"></div>
        <div class="swiper-slide"><img src="./img/sample2.png"></div>
        <div class="swiper-slide"><img src="./img/sample3.png"></div>
        <div class="swiper-slide"><img src="./img/sample4.png"></div>
        <div class="swiper-slide"><img src="./img/sample5.png"></div>
        <div class="swiper-slide"><img src="./img/sample6.png"></div>
    </div>
    <div class="swiper-pagination"></div>
    <div class="swiper-button-prev"></div>
    <div class="swiper-button-next"></div>
</div>


<script>
    const swiper = new Swiper('.sample-slider', {
        loop: true,
        autoplay: {
            delay: 2000,
        },
        pagination: {
            el: '.swiper-pagination',
        },
        navigation: {
            nextEl: ".swiper-button-next",
            prevEl: ".swiper-button-prev",
        },

        slidesPerView: 2,
        centeredSlides : true,
        effect: "creative",
        creativeEffect: {
            limitProgress: 2,
            prev: {
                translate: ["100%", -200, -1000],
                rotate: [0, 0, 40],
                shadow: true,
            },
            next: {
                translate: ["-100%", 200, -1000],
                rotate: [0, 0, 40],
                shadow: true,
            },
        }
    })
</script>
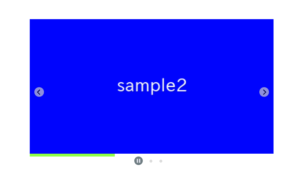
Slider with vertical-oriented previous and next slides
<div class="swiper sample-slider">
    <div class="swiper-wrapper">
        <div class="swiper-slide"><img src="./img/sample1.png"></div>
        <div class="swiper-slide"><img src="./img/sample2.png"></div>
        <div class="swiper-slide"><img src="./img/sample3.png"></div>
        <div class="swiper-slide"><img src="./img/sample4.png"></div>
        <div class="swiper-slide"><img src="./img/sample5.png"></div>
        <div class="swiper-slide"><img src="./img/sample6.png"></div>
    </div>
    <div class="swiper-pagination"></div>
    <div class="swiper-button-prev"></div>
    <div class="swiper-button-next"></div>
</div>

<script>
    const swiper = new Swiper('.sample-slider', {
        loop: true,
        autoplay: {
            delay: 2000,
        },
        pagination: {
            el: '.swiper-pagination',
        },
        navigation: {
            nextEl: ".swiper-button-next",
            prevEl: ".swiper-button-prev",
        },

        slidesPerView: 2,
        centeredSlides : true,
        effect: "creative",
        creativeEffect: {
            limitProgress: 1,
            prev: {
                translate: ['100%', 0, -200],
                rotate: [0, 0, 90],
            },
            next: {
                translate: ['-100%', 0, -200],
                rotate: [0, 0, -90],
            },
        }
    })
</script>
Slider that comes from behind
<div class="swiper sample-slider">
    <div class="swiper-wrapper">
        <div class="swiper-slide"><img src="./img/sample1.png"></div>
        <div class="swiper-slide"><img src="./img/sample2.png"></div>
        <div class="swiper-slide"><img src="./img/sample3.png"></div>
        <div class="swiper-slide"><img src="./img/sample4.png"></div>
        <div class="swiper-slide"><img src="./img/sample5.png"></div>
        <div class="swiper-slide"><img src="./img/sample6.png"></div>
    </div>
    <div class="swiper-pagination"></div>
    <div class="swiper-button-prev"></div>
    <div class="swiper-button-next"></div>
</div>

<script>
    const swiper = new Swiper('.sample-slider', {
        loop: true,
        autoplay: {
            delay: 2000,
        },
        pagination: {
            el: '.swiper-pagination',
        },
        navigation: {
            nextEl: ".swiper-button-next",
            prevEl: ".swiper-button-prev",
        },

        slidesPerView: 2,
        centeredSlides : true,
        effect: "creative",
        creativeEffect: {
            limitProgress: 6,
            prev: {
                translate: [0, 0, -100],
                rotate: [0, 0, 0],
            },
            next: {
                translate: ['80%', '-100%', -1000],
                rotate: [0, 0, 0],
            },
        }
    })
</script>
That is all. I encourage you to experiment with creativeEffect and create your own unique slider!
There are the other sliders which can be made by effect option.
[Swiper]How to create cube slider
[Swiper]How to create card slider
[Swiper]How to create coverflow slider
[Swiper]How to create fade slider
[Swiper]How to create flip slider
If you are interested in how various slider can be made by swiper.js, please refer below article!
Swiper Demo 22 Slider