Although there are many javascript libraries which can make a silder, Swiper.js is the one of the most popular library which dose not require jQuery.
In this article, we will discuss how to use Swiper.js with React.
(Note: We will proceed with the assumption that you are already familiar with React.)
Table of Contents
①Install Swiper
npm i swiper@8At this point (September 2023), the latest version is 10, but I personally think that version 8 is the most stable.
②Simplest slider component
First, let’s create the simplest slider component without using any options.
import { Swiper, SwiperSlide } from 'swiper/react'
import 'swiper/css'
import './style.css'

export default function SampleSlider() {
    return (
        <Swiper
            className="sample-slider"
        >
            <SwiperSlide><img src="/img/sample1.png" /></SwiperSlide>
            <SwiperSlide><img src="/img/sample2.png" /></SwiperSlide>
            <SwiperSlide><img src="/img/sample3.png" /></SwiperSlide>
        </Swiper>
    )
}
.sample-slider {
width: 70%;
}
.sample-slider img {
width: 100%;
}
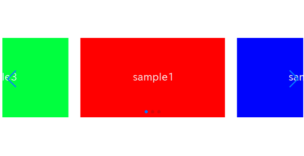
Now we can see a simple slider!
The slide will move when you swipe.


③Add Navigation
In Swiper.js, the left and right arrows are referred to as “navigation“.
To add navigation, you need to perform the following four steps:
・Import the Navigation module.
・Import the navigation styles.
・Specify the Navigation module in the modules property.
・Specify the navigation property.
import { Swiper, SwiperSlide } from 'swiper/react'
import { Navigation } from 'swiper'     //added
import 'swiper/css/navigation'          //added
import 'swiper/css'
import './style.css'

export default function SampleSlider() {
    return (
        <Swiper
            className="sample-slider"
            modules={[Navigation]}      //added
            navigation                  //added
        >
            <SwiperSlide><img src="/img/sample1.png" /></SwiperSlide>
            <SwiperSlide><img src="/img/sample2.png" /></SwiperSlide>
            <SwiperSlide><img src="/img/sample3.png" /></SwiperSlide>
        </Swiper>
    )
}
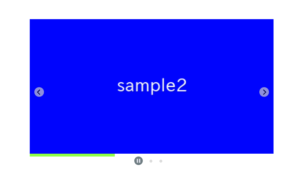
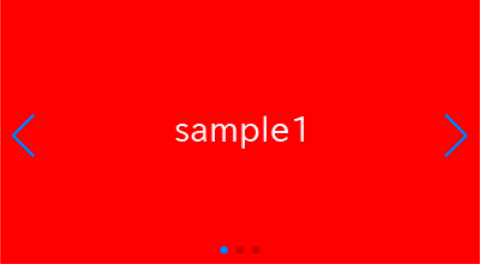
Navigation(arrows) has been added.
④Add Pagination
In Swiper.js, the dots that indicate the current slide position are referred to as “pagination“.
To add pagination, you need to perform the following four steps:
・Import the Pagination module.
・Import the pagination styles.
・Specify the Pagination module in the modules property.
・Specify the pagination property.
import { Swiper, SwiperSlide } from 'swiper/react'
import { Navigation, Pagination } from 'swiper'     //modified
import 'swiper/css/navigation'
import 'swiper/css/pagination'                      //added
import 'swiper/css'
import './style.css'

export default function SampleSlider() {
    return (
        <Swiper
            className="sample-slider"
            modules={[Navigation, Pagination]}      //modified
            navigation
            pagination                              //added
        >
            <SwiperSlide><img src="/img/sample1.png" /></SwiperSlide>
            <SwiperSlide><img src="/img/sample2.png" /></SwiperSlide>
            <SwiperSlide><img src="/img/sample3.png" /></SwiperSlide>
        </Swiper>
    )
}
Pagination(dots) has been added.
⑤Make the slider loop
One commonly used option is the loop option.
Enabling it makes the first slide appear again after the last slide, creating a loop.
Add loop={true} to enable this feature.
import { Swiper, SwiperSlide } from 'swiper/react'
import { Navigation, Pagination } from 'swiper'
import 'swiper/css/navigation'
import 'swiper/css/pagination'
import 'swiper/css'
import './style.css'

export default function SampleSlider() {
    return (
        <Swiper
            className="sample-slider"
            modules={[Navigation, Pagination]}
            navigation
            pagination
            loop={true}     //addedf
        >
            <SwiperSlide><img src="/img/sample1.png" /></SwiperSlide>
            <SwiperSlide><img src="/img/sample2.png" /></SwiperSlide>
            <SwiperSlide><img src="/img/sample3.png" /></SwiperSlide>
        </Swiper>
    )
}
The slider has become to loop.
⑥Make the slider autoplay
Another commonly used option is the autoplay option.
Just like navigation and pagination, you also need to import a module for autoplay.
The time interval until the next slide transition is determined by the value of “delay“.
In the following case, the slides will automatically switch every 2 seconds.
import { Swiper, SwiperSlide } from 'swiper/react'
import { Navigation, Pagination, Autoplay} from 'swiper'    //modified
import 'swiper/css/navigation'
import 'swiper/css/pagination'
import 'swiper/css'
import './style.css'

export default function SampleSlider() {
    return (
        <Swiper
            className="sample-slider"
            modules={[Navigation, Pagination, Autoplay]}    //modified
            navigation
            pagination
            loop={true}
            autoplay={{ delay:2000 }}                       //added
        >
            <SwiperSlide><img src="/img/sample1.png" /></SwiperSlide>
            <SwiperSlide><img src="/img/sample2.png" /></SwiperSlide>
            <SwiperSlide><img src="/img/sample3.png" /></SwiperSlide>
        </Swiper>
    )
}
The slider has become to autoplay.
The full text of source code
In the end, I put the full text of source code.
npm i swiper@8import { Swiper, SwiperSlide } from 'swiper/react'
import { Navigation, Pagination, Autoplay} from 'swiper'
import 'swiper/css/navigation'
import 'swiper/css/pagination'
import 'swiper/css'
import './style.css'
export default function SampleSlider() {
return (
<Swiper
className="sample-slider"
modules={[Navigation, Pagination, Autoplay]}
navigation
pagination
loop={true}
autoplay={{ delay:2000 }}
>
<SwiperSlide><img src="/img/sample1.png" /></SwiperSlide>
<SwiperSlide><img src="/img/sample2.png" /></SwiperSlide>
<SwiperSlide><img src="/img/sample3.png" /></SwiperSlide>
</Swiper>
)
}.sample-slider {
width: 70%;
}
.sample-slider img {
width: 100%;
}
That is all, it was about how to use Swiper.js with React.